-
Ticketed Livestreaming
Integrate ticketed livestreams on your existing website.
-
On-Demand
Monetise your past events with a fee to watch each video.
-
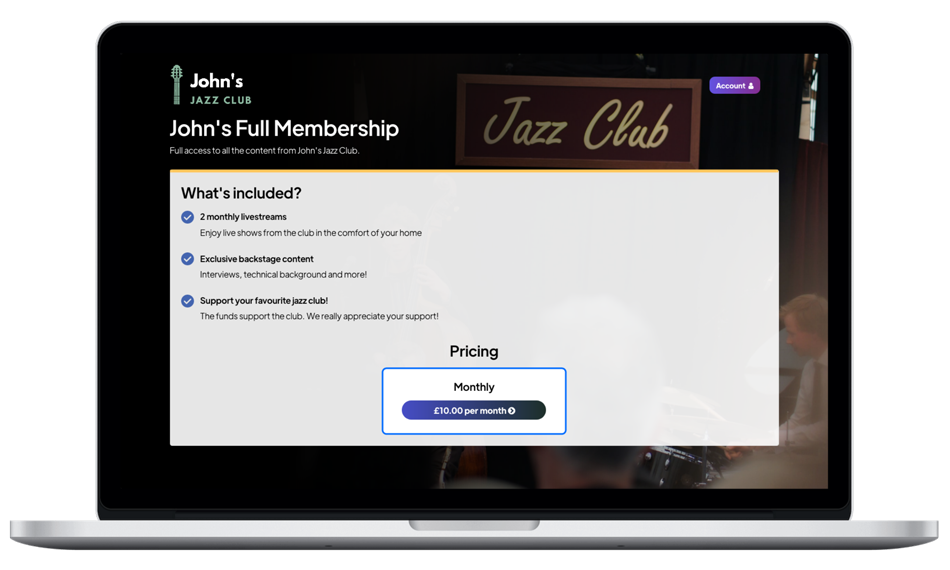
Subscriptions New
Receive a monthly fee from your patrons and provide access to video content.
-
Music Royalty Coverage
Our services all come with multi-territory royalty coverage, making life easy.
-
Bespoke Solutions
Need a custom-built online solution? We'll build it for you. Just get in touch.
-
Conferences Coming Soon
Perfect for broadcasting live educational events with high-quality audio and video.
-
Music venues
A solution that will integrate seamlessly on any venue website.
-
Non-Profits
Create a membership, providing patrons with online video content.
-
Festivals
Your festival livestreaming partner: from multiple stages, to royalties, we have you covered.
-
Theatre
Providing the online video infrastructure for shows from theatres around the world.
-
Comedy
Bringing the Comedy Club atmosphere to homes across the world.
-
Artists
Charge viewers for your content. From livestreams to subscriptions.
 Request a Personalised Demo
Start your journey with usCreate an account and then follow the instructions below to quickly and easily get started with Ticketed Livestreaming, On-Demand Video or Subscriptions! |